Are you a gun enthusiast or a professional gunsmith who’s looking for the best plunger tube staking tool for your 1911 pistol? Look no further because we’ve got you covered. In this article, we’ll provide you with everything you need to know about the 1911 plunger tube staking tool.
What is a Plunger Tube?
Before diving into the details of the plunger tube staking tool, let’s first understand what a plunger tube is. A plunger tube is a small metal component that is usually found on the side of a 1911 pistol frame. It serves as a guide for the plunger and spring that are responsible for pushing up the thumb safety and slide stop during operation.
Why Use a Plunger Tube Staking Tool?
One common issue with 1911 pistols is that the plunger tube can become loose over time due to wear and tear. If left unchecked, this can lead to malfunctions and even safety hazards. This is where the plunger tube staking tool comes in handy.
The plunger tube staking tool is designed to securely fasten the plunger tube to the frame of the 1911 pistol. By using this tool, you can prevent any unwanted movement of the plunger tube and ensure that your pistol functions smoothly and safely.
Types of Plunger Tube Staking Tools
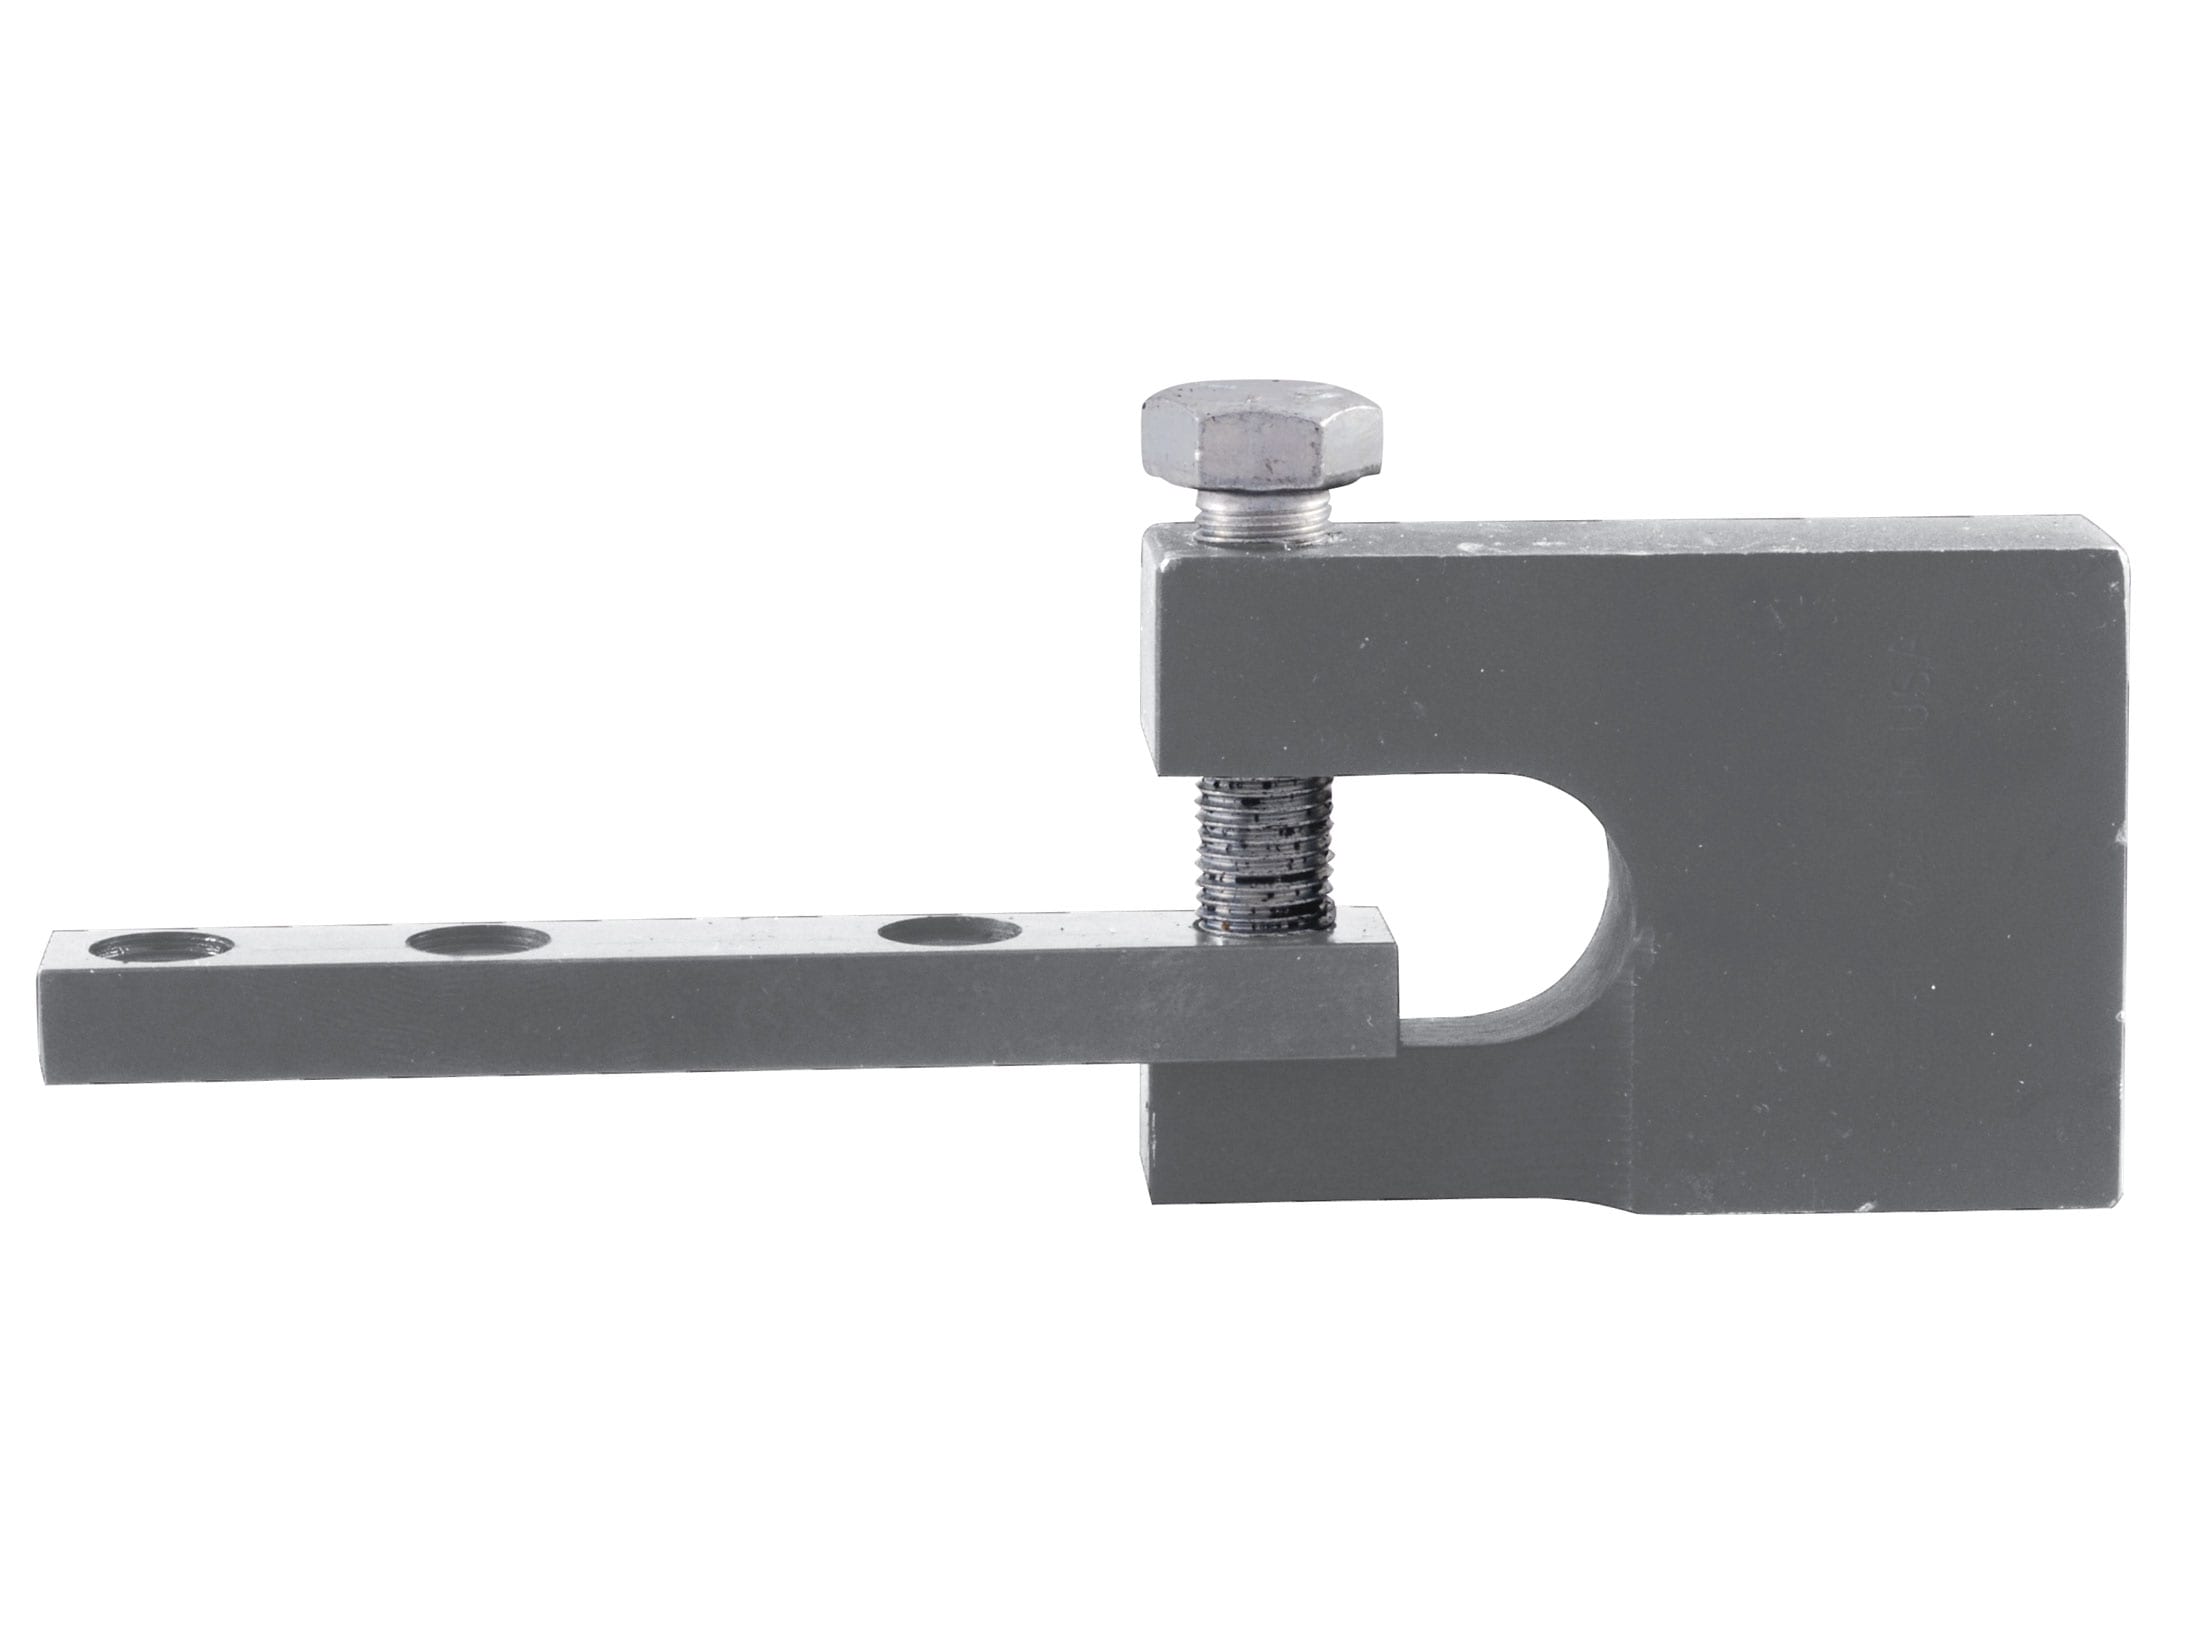
There are two main types of plunger tube staking tools: hand-held and press-fit. Hand-held staking tools are easy to use but require more effort compared to press-fit tools. On the other hand, press-fit tools require less effort but may be more expensive.
Hand-held staking tools typically come in two designs: one-piece and multi-piece. One-piece designs are simpler and more compact, while multi-piece designs offer more versatility and adjustability.
Press-fit staking tools come in various designs as well. Some have a simple press-fit mechanism, while others may have additional features such as interchangeable heads or built-in alignment guides.
How to Use a Plunger Tube Staking Tool
Using a plunger tube staking tool may seem daunting at first, but with practice and proper technique, it can be done easily. Here are the general steps on how to use a plunger tube staking tool:
Step 1: Disassemble your 1911 pistol and remove the old plunger tube.
Step 2: Clean the area where the plunger tube will be installed.
Step 3: Insert the new plunger tube into its designated slot on the frame.
Step 4: Place the staking tool over the plunger tube and align it with the staking grooves.
Step 5: Apply pressure using either a hand-held or press-fit tool until the metal of the plunger tube is compressed and secured firmly onto the frame.
Step 6: Reassemble your pistol and test its functionality.
Tips for Using a Plunger Tube Staking Tool
Here are some tips to help you make the most out of your plunger tube staking tool:
Tip #1: Always use a high-quality staking tool to ensure that it can withstand repeated use.
Tip #2: Make sure that you properly align the staking tool with the grooves on the plunger tube to avoid any damage or misalignment.
Tip #3: Apply enough pressure to securely fasten the plunger tube, but not too much that it damages the frame or causes excessive compression.
Tip #4: Test your pistol’s functionality after installation to ensure that everything is working correctly.
Conclusion
A high-quality plunger tube staking tool is an essential investment for any gun enthusiast or professional gunsmith who wants to maintain their 1911 pistol’s performance and safety. By using this tool, you can easily and securely fasten the plunger tube to the frame, preventing any unwanted movement or malfunction.
We hope this guide has helped you understand everything you need to know about the 1911 plunger tube staking tool. If you have any further questions or concerns, feel free to consult with a professional gunsmith or refer to our wiki reference below.
Wiki Reference:
https://en.wikipedia.org/wiki/Plunger_tube