As a cowboy, rancher or horseman, you understand the importance of quality leather tooling. Western leather tooling patterns are a timeless art form that have been passed down from generation to generation. Whether you’re looking to create beautiful saddles, belts, wallets or other leather goods, mastering the art of western leather tooling patterns can take your craft to the next level.
In this comprehensive guide, we’ll explore everything you need to know about western leather tooling patterns. From the history and origins of this craft to the tools and techniques used to create stunning designs, we’ll cover it all. So saddle up and let’s get started!
What are Western Leather Tooling Patterns?
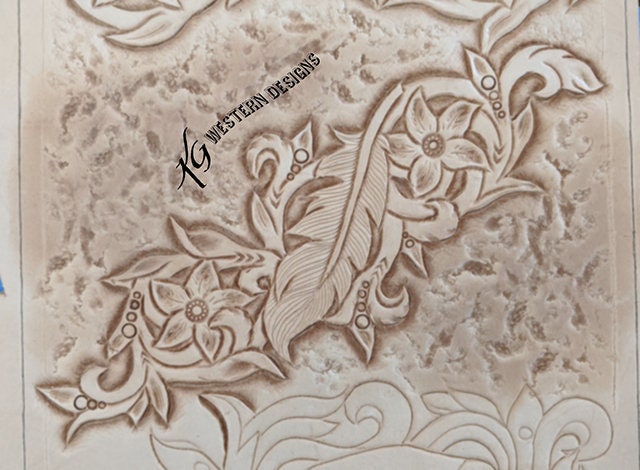
Western leather tooling patterns are decorative designs created on leather using various tools and techniques. These patterns can be simple or complex, and they can be used to adorn a wide variety of leather goods such as saddles, belts, wallets, boots and more.
The practice of creating western leather tooling patterns dates back centuries. It is believed that Native Americans were some of the first people to use this technique in their crafts. Later on, cowboys and ranchers began incorporating these designs into their saddles and other gear as a way to add personal style and flair.
Today, western leather tooling patterns remain popular among craftsmen and hobbyists alike. With the right tools and techniques, anyone can create stunning designs that showcase their personality and creativity.
Tools Needed for Western Leather Tooling Patterns
Before you start creating your own western leather tooling patterns, you’ll need to gather some essential tools. Here are some of the most commonly used tools in this craft:
1. Swivel Knife – This knife is used for cutting out designs in the leather.
2. Stamps – Stamps come in a variety of shapes and sizes and are used for creating impressions on the leather.
3. Mallet – A mallet is used to strike the stamps and create impressions in the leather.
4. Beveler – A beveler is used for cutting a groove around the outside of a design.
5. Edge Beveler – This tool is used for beveling the edges of your leather pieces.
6. Burnisher – A burnisher is used for smoothing and polishing the edges of your leather after you’ve cut them.
7. Dye or Stain – You’ll need dye or stain to color your designs once they’re complete.
8. Sponge or Brush – Use a sponge or brush to apply the dye or stain evenly to your leather piece.
These are just some of the essential tools needed for western leather tooling patterns. As you become more experienced, you may find that you need additional tools to create more complex designs.
Techniques Used in Western Leather Tooling Patterns
Now that you have an idea of the tools needed, let’s explore some of the common techniques used in western leather tooling patterns:
1. Cutting – The first step in creating a western leather tooling pattern is cutting out your design using a swivel knife. This requires precision and practice to achieve clean lines and accurate cuts.
2. Stamping – After cutting out your design, you’ll need to use various stamps to create impressions on the leather. Stamps come in many shapes and sizes, so it’s important to choose the right ones for your design.
3. Beveling – Once you’ve stamped your design, you can use a beveler to cut a groove around the outside of it. This gives your design depth and dimensionality.
4. Edging – After beveling your design, you’ll want to clean up any rough edges using an edge beveler. This will give your finished piece a polished look.
5. Coloring – Finally, you can add color to your design using dye or stain. Apply the coloring evenly with a sponge or brush, and allow it to dry completely before finishing.
Tips for Creating Stunning Western Leather Tooling Patterns
Creating a beautiful western leather tooling pattern takes practice, patience and attention to detail. Here are some tips to help you get started:
1. Start Simple – If you’re new to western leather tooling patterns, start with simple designs and work your way up to more complex ones.
2. Choose the Right Leather – Not all leather is created equal. Make sure you choose high-quality leather that’s suitable for tooling.
3. Practice Your Cuts – Cutting out designs with a swivel knife requires practice and precision. Take your time and focus on making clean cuts.
4. Use the Right Stamps – Different stamps create different impressions on the leather. Choose the right stamps for your design to achieve the desired effect.
5. Be Patient – Western leather tooling patterns require time and attention to detail. Don’t rush the process; take your time and enjoy the craft.
Conclusion
Western leather tooling patterns are a beautiful art form that have been passed down for centuries. With the right tools, techniques and practice, anyone can create stunning designs that showcase their personality and creativity.
We hope this comprehensive guide has provided you with valuable insights into the world of western leather tooling patterns. Remember to start simple, choose high-quality materials and be patient as you develop your skills.
For further reading on western leather tooling patterns, we recommend checking out these authoritative resources:
– Tandy Leather: https://www.tandyleather.com/en/leather-craft-videos/how-to-tool-leather
– Leathercraft Library: https://www.leathercraftlibrary.com/category/guide-to-leather-tooling
– Wikipedia: https://en.wikipedia.org/wiki/Leather_tooling


