If you’re into nail art, then you know how important it is to have the right tools. One of those tools that shouldn’t be missing from your kit is a dotting tool. Not only does it help create intricate designs with ease, but it’s also versatile enough to use for other DIY projects. In this article, we’ll explore everything you need to know about dotting tools, including how to use them and where to find the best ones.
What is a Dotting Tool?
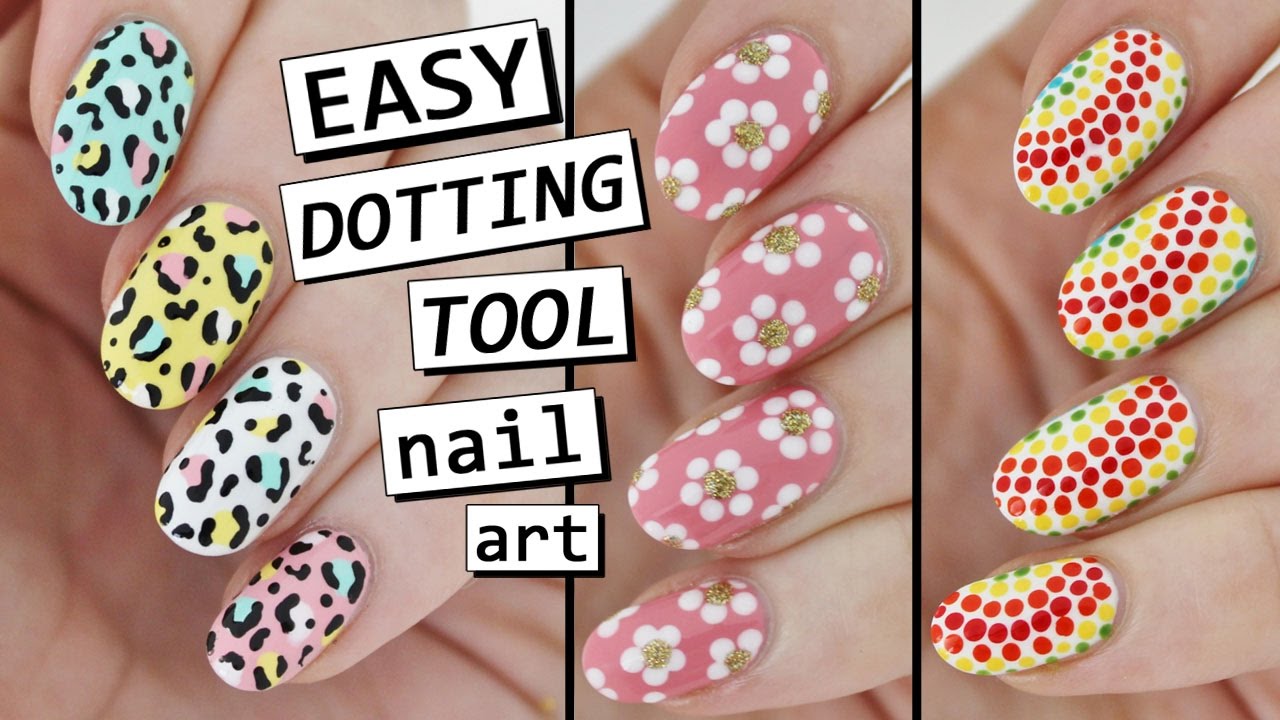
A dotting tool is a small, double-ended instrument that features two different sized tips at each end. The size of the tip varies between brands, but typically ranges from 0.5mm to 5mm in diameter. The tool is primarily used for creating dots or circles on nails, but can also be used for other nail art techniques such as marbling and ombre effects.
Using a Dotting Tool
Using a dotting tool may seem intimidating at first, but with practice and patience, anyone can master this skill. Here’s a step-by-step guide on how to use a dotting tool:
Step 1: Choose your nail polish colors and lay out all necessary materials.
Step 2: Apply a base coat and let it dry completely before moving on to the next step.
Step 3: Dip the large end of the dotting tool into your desired nail polish color.
Step 4: Gently press the dotting tool onto your nail bed and lift it up quickly to create a perfect circle.
Step 5: Repeat steps 3-4 until you achieve your desired design.
Step 6: Use the smaller end of the dotting tool to add small details or accents to your design.
Where Can You Find A Dotting Tool?
There are many places where you can purchase a dotting tool. Some of the best places to find them are:
1. Beauty Supply Stores: Local beauty supply stores often carry dotting tools in their nail art sections.
2. Online Retailers: Websites such as Amazon and eBay have a wide variety of dotting tools available for purchase.
3. Arts and Crafts Stores: Stores like Michaels and Hobby Lobby also carry dotting tools in their art supplies section.
Tips and Tricks for Using a Dotting Tool
Here are some tips and tricks to help you get the most out of your dotting tool:
1. Experiment with different sized dots: The size of the dotting tool tip will determine the size of your dots. Try using multiple sizes to create a unique design.
2. Use toothpicks or bobby pins: If you don’t have a dotting tool on hand, you can use a toothpick or bobby pin as an alternative.
3. Clean your tool after each use: To prevent any leftover polish from drying on your dotting tool, clean it with acetone or nail polish remover after every use.
4. Practice makes perfect: Don’t be discouraged if your first attempt isn’t perfect. Keep practicing and experimenting until you achieve the desired look.
Conclusion
A dotting tool is an essential part of any nail art kit. It’s versatile, easy to use, and can help take your nail designs to the next level. Whether you’re a professional nail artist or just starting out, investing in a good quality dotting tool is worth it.
References
“Dotting Tool.” Wikipedia, Wikimedia Foundation, 11 Aug. 2021, en.wikipedia.org/wiki/Dotting_tool.
“How to Use a Dotting Tool for Nail Art | DIY Tutorial.” YouTube, uploaded by Cute Polish, 10 Jan. 2018, www.youtube.com/watch?v=0LkCgBzTj9M&t=19s.
“The Best Dotting Tool for Nail Art.” Byrdie, 11 Oct. 2020, www.byrdie.com/best-dotting-tools-for-nail-art-5083479.