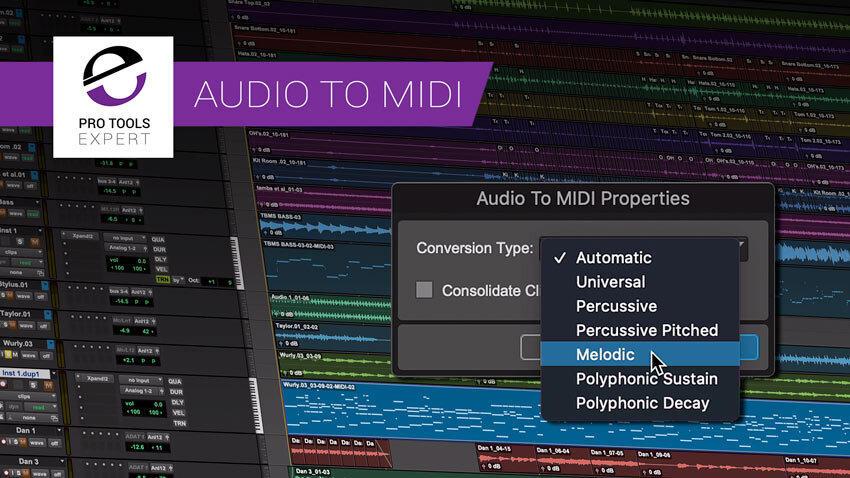
If you’re a music producer or audio engineer, you’ve probably heard of Pro Tools MIDI. This powerful tool is essential for creating professional-sounding music and has been the industry standard for years. Whether you’re a seasoned pro or just getting started, understanding how to use Pro Tools MIDI can take your productions to the next level.
In this article, we’ll explore everything you need to know about Pro Tools MIDI, from the basics of MIDI to advanced tips and tricks. We’ll cover topics like setting up your MIDI controller, creating custom presets, and using MIDI plugins to enhance your sound. So grab your headphones and let’s dive in!
What is MIDI?
Before we get into Pro Tools MIDI specifically, let’s start with the basics of what MIDI actually is. MIDI stands for Musical Instrument Digital Interface and is a protocol that allows electronic musical instruments, computers, and other devices to communicate with each other.
MIDI messages are basically digital instructions that tell a device what notes to play, when to play them, and how they should sound. These messages can be sent between devices over a physical cable or wirelessly over Bluetooth or Wi-Fi.
MIDI is used for a wide range of applications in music production, including controlling synthesizers and drum machines, triggering samples and loops, and recording performances on MIDI-enabled instruments like keyboards and drum pads.
Setting Up Your MIDI Controller
Once you have a basic understanding of what MIDI is and how it works, it’s time to set up your MIDI controller in Pro Tools. A MIDI controller is any device that sends out MIDI messages when you play it – think keyboards, drum pads, or even guitar controllers.
The first step in setting up your controller is making sure it’s connected to your computer or interface via USB or another cable. Then open up Pro Tools and go to Setup > MIDI > Input Devices. Here you should see your controller listed – select it and hit Enable.
Next, go to Setup > MIDI > MIDI Studio and click New to create a new MIDI studio setup. Give your setup a name (like “My MIDI Studio”) and then drag your controller from the left-hand column into the center column.
You can also add other devices like synthesizers or drum machines to your setup by dragging them in as well. Once everything is set up, you can start recording and playing back MIDI data in Pro Tools.
Creating Custom Presets
One of the great things about Pro Tools MIDI is the ability to create custom presets for your instruments and effects. A preset is basically a pre-configured setting that you can save and recall later, making it easy to recreate a certain sound or effect.
To create a new preset, first open up the plugin or instrument you want to save a preset for. Make any adjustments to the settings until you have the sound you want. Then go to the plugin’s menu and select Save As.
Give your preset a name (like “Dark Pad” or “808 Bass”) and choose where you want to save it. You can also add tags or keywords to make it easier to find later.
Once you’ve saved your preset, you can recall it later by opening up the plugin or instrument and selecting it from the preset menu. This makes it easy to switch between different sounds during a session without having to manually adjust all of the settings each time.
Using MIDI Plugins
Pro Tools comes with several built-in plugins specifically designed for working with MIDI data. These plugins can help enhance your sound, speed up your workflow, and even generate new musical ideas.
One popular MIDI plugin is called “MIDI Editor.” This plugin allows you to view and edit MIDI data directly within Pro Tools, rather than having to use a separate application like Ableton Live or Logic Pro.
Another useful plugin is “MIDI Quantize,” which automatically corrects the timing of MIDI notes to align with a specific grid or tempo. This can be especially helpful when working with drum loops or other rhythmic patterns.
Finally, there are several third-party MIDI plugins available for Pro Tools that can add even more functionality. Some popular options include Native Instruments’ Komplete Kontrol and Arturia’s Analog Lab.
Conclusion
Pro Tools MIDI is an incredibly powerful tool for music production, allowing you to control and manipulate virtually any aspect of your sound. By understanding the basics of MIDI, setting up your controller, creating custom presets, and using MIDI plugins, you can take your productions to the next level.
Of course, this is just scratching the surface of what’s possible with Pro Tools MIDI. There are countless resources available online to help you learn more about this amazing tool and how to use it effectively in your own work.
So whether you’re a seasoned pro or just getting started, don’t be afraid to experiment with Pro Tools MIDI and see where it takes you!
References:
– “MIDI – Wikipedia.” https://en.wikipedia.org/wiki/MIDI
– “How to Set Up Your MIDI Controller in Pro Tools | Sweetwater.” https://www.sweetwater.com/insync/set-midi-controller-pro-tools/
– “How to Create and Use Presets in Avid Pro Tools | AudioJungle.” https://audiojungle.net/blog/how-to-create-and-use-presets-in-avid-pro-tools/
– “10 Essential Third-Party Plugins for Pro Tools | MusicTech.” https://www.musictech.net/guides/buyers-guide/essential-third-party-plugins-for-pro-tools/


